
Suitable for:
- Printed invitations
- Email Invitations
- SMS / Text Message invitations
- Social Media / Messaging Apps invitations (e.g. Facebook, WhatsApp, etc)
Great for when:
- You want to send / distribute personalized invitations to all guests
- You want to control guest count limits per guest
When you "Add guests Individually"...
- You add your guest's name (required)
- You can also add your guest's email (optional)
- You choose the total number of people included with this guest's invitation (including the named guest)
- When you send your invitation, this guest will receive a personalized invitation with a unique invitation link, just for them! (which will help you track if they've received and viewed their invitation to your event)
Alternative Method:
- You can also send non-personalized invites
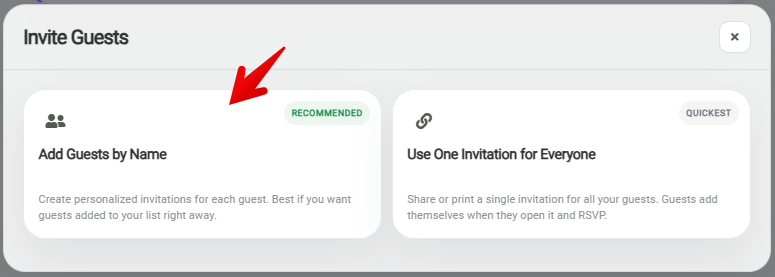
How to Add Guests by Name (and send personalized invites)
Step 1: Access the 'Invite Guests' screen
There are two ways you can access this page:
- You will be automatically forwarded to this page after clicking the "Continue" button on the 'Details' page
- You can come back to this page anytime by opening the event and clicking on "Invite" in the top navigation bar
Step 2: Click the "Invite guests" button
Step 3: Choose "Add / Edit Guests"
Step 3: Add guests to your guestlist
There are three ways you can add your guests...
Option 1: Add guests one-by-one
- Add your guest's info and click "Save & continue" button (Name is required. Email is optional)
Option 2: Add guests in bulk from a list (Paste a list)
- Follow the on-screen instructions to add your list
Option 3: Add guests from contact list
- Your Address Book will pop open. This Address Book contains the contacts for any/all contacts you've added to past events with YAY-List.
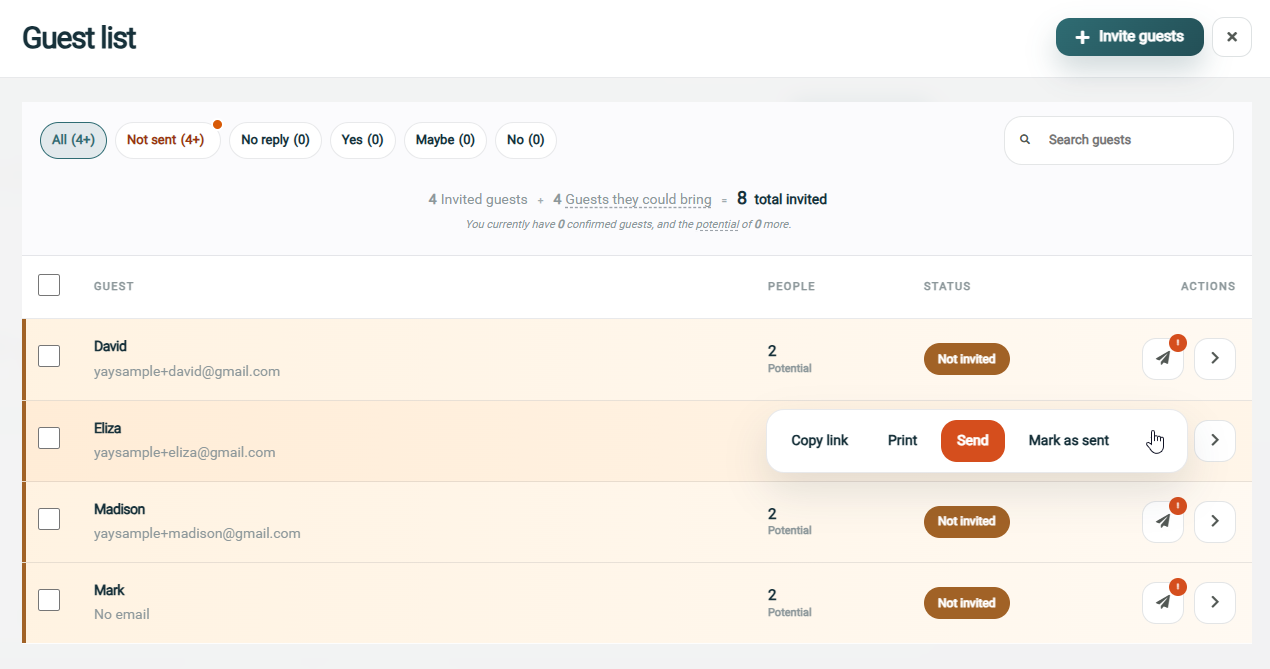
Step 4: Send your invitations
- As you add your guests, you will be prompted to send their invitations. Or, you can wait and send them latter - both one by one or in bulk.
- To send, or resend, invitations later, from the "Invite" page, click "View all guests" at top of page to display the Guest List
- With the guest list showing, clicking on the send button (airplane icon) for any guest will reveal the send actions for that specific guest
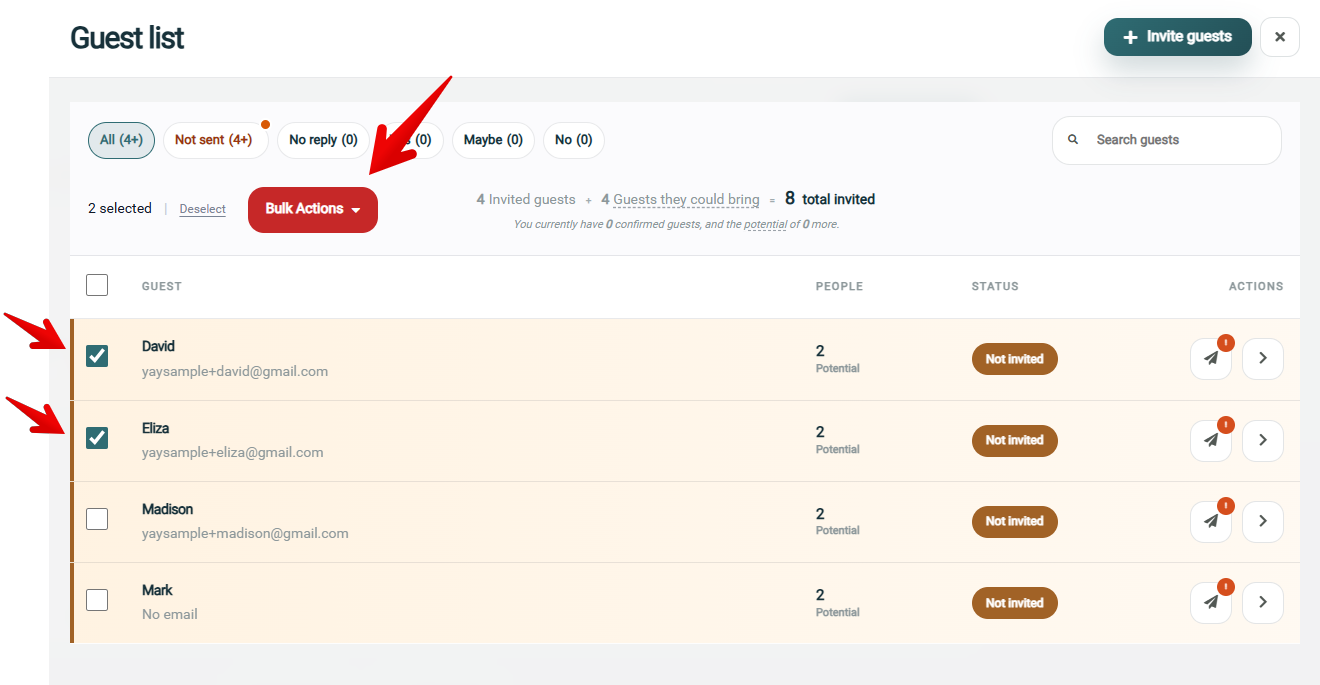
- Or, you can select multiple guests to reveal the "Bulk Actions" menu with options to send or print multiple invitations at once
Other Helpful Articles:
- You can edit your guest's information as and when needed
- How to Track your guests' replies
- Send update and thank you messages to your guests